Paint 3D: The Hidden Fun in Windows 10


 You may have no need to use Paint 3D, pre-installed software on Windows 10, for any reason than to have fun.


And that's reason enough.


Here for a fun time, not a long time.


Your default screen looks like this:


I can put texture and stickers on 3D objects - A wood texture is on the dog, and an uploaded image of me is on that half-dome up there, looking very Majora's Mask-esque.


You can save the image as both 2D and 3D - although it shows up as simply 'image', and you can adjust the 3D-ness.

You can also access the 3D Library, though selecting a piece doesn't save it locally. There are some pretty cool ones up there!


Adjusting 3D elements on all three axis(es?) - X, Y, and Z - is possible too. 


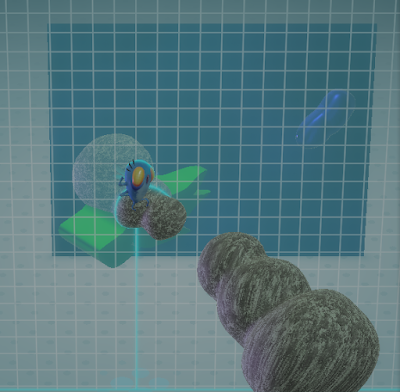
In the 3D shapes area, you can also draw 2D objects and they pop up in 3D right before your eyes!


                                            The green ship and the blue blob.

You can also adjust lighting colors and angles. The above is a custom one, the one below is called 'Mist'.


The textures area has options like Dull metal, gloss, and matte, but I don't see it having any effect on the art when I use it as a background. It shows up more on the text and 3D elements, but I wish it were a background option.

In the brushes tab, you can color over the 3D objects.


Graphic Design is my passion.


 If there's one thing Windows has yet to perfect, it's grabbing and moving text after it's typed. This is no exception.

 3D Paint doesn't have the finesse of Canva, but it makes up for it with interesting ideas and elements that are not behind paywalls. There are many shoutouts to Minecraft here - I guess taking screenshots and editing them here is something players do.

Lucky them, they have a lot of beginner options with 3D Paint.

Comments

Popular posts from this blog

Connecting IoT Devices to a Registration Server (Packet Tracer, Cisco)

In Packet Tracer, a demo software made by Cisco Systems. It certainly has changed a lot since 2016. It's almost an Olympic feat to even get started with it now, but it does look snazzy. This is for the new CCNA, that integrates, among other things, IoT and Automation, which I've worked on here before. Instructions here . I don't know if this is an aspect of "Let's make sure people are paying attention and not simply following blindly", or an oversight - The instructions indicate a Meraki Server, when a regular one is the working option here. I have to enable the IoT service on this server. Also, we assign the server an IPv4 address from a DHCP pool instead of giving it a static one. For something that handles our IoT business, perhaps that's safer; Getting a new IPv4 address every week or so is a minimal step against an intruder, but it is a step. There are no devices associated with this new server; In an earlier lab (not shown), I attached them to 'H

What Do You Need? [List of Offered Services]

2023 Version is here, at this handy Notion Page.

Building, Breaking, and Building A CRM with Retool

 I like no- or low-code solutions to things. I've often wanted to simply push a button or move some GUI around and have the code implement itself.  I've thought about building something that's like a customer relationship management (CRM) system for keeping up with my network better than my little spreadsheet where I click links and then go like something. The general idea in this CRM Development is:  To have a GUI to add people to a NRM (Network Relationship Management).       Attach it to a database (MySQL is what I went with eventually using Amazon Relational Database service, but you can use PostGRES, and probably others).     Make sure components are connected to each other in the retool interface. This video is a good start. Watching the tutorial video, heard some SQL commands and went 'Oh no 😳" before going "Wait I know basic SQL", which is good, because you'll see.  When you get set up, there's a plethora of resources you can use -- Incl